Documentation
Installation
Requirements
| Web Server | Linux and Apache 2.4+ with mod_rewrite and mod_headers |
| Database | MySQL 5.7.22+ or MariaDB 10.5.0+. InnoDB storage engine |
| Minimum PHP Version | 8.2.0 (currently tested up to 8.5.12) |
| PHP Extensions | curl, fileinfo, json, openssl, pdo, pdo_mysql, zip |
Storage space and memory: Depends on the amount of products you want to list, and the potential traffic. A typical small-medium store on any standard shared or VPS hosting (4GB+ RAM, 1GB+ SSD storage space) should be sufficient. The more processing power and RAM, the better.
Email delivery: PHP's native mail() can be used as a fallback, but for reliable email delivery (avoiding spam folders and rejections) we strongly recommend using SMTP.
Orders: To test and start accepting orders, you will need a PayPal developer account, be able to create an app, and obtain sandbox / live API keys.
Install Wizard
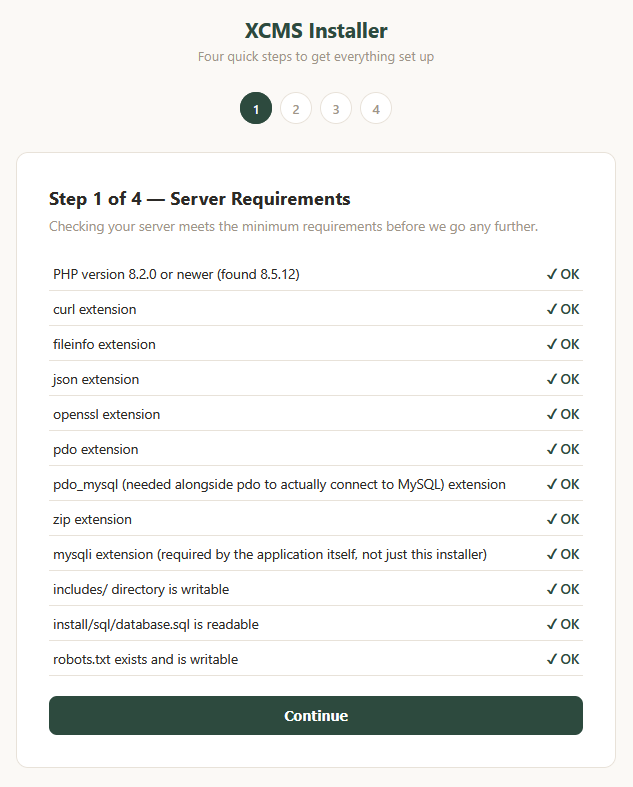
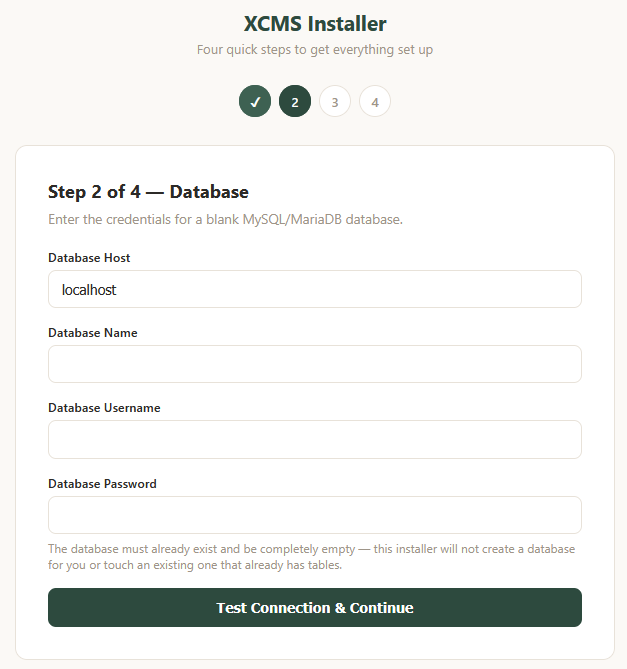
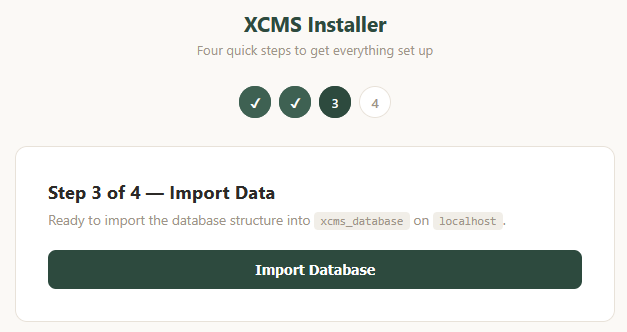
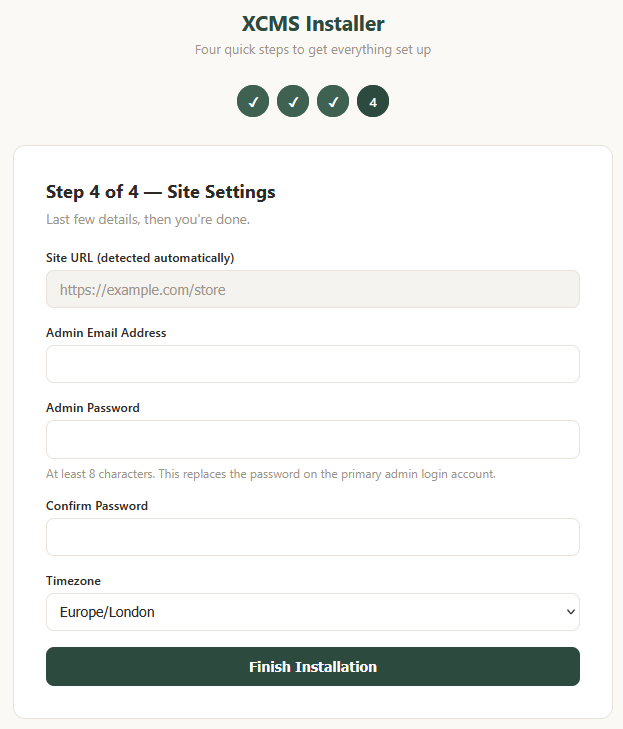
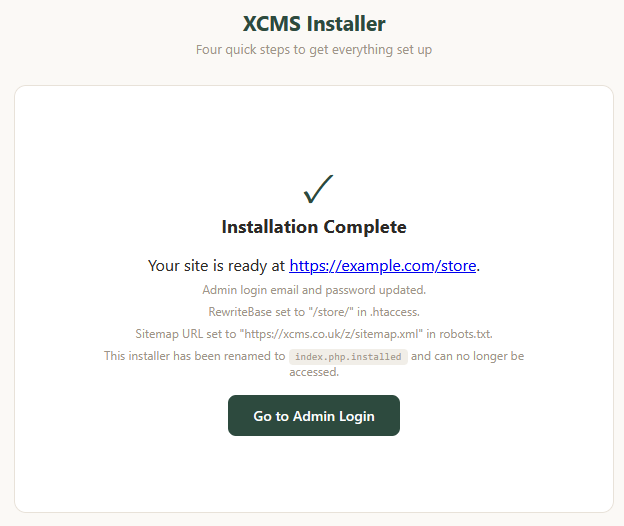
- Download the XCMS Core distribution zip file from your account, or from your order confirmation email.
- Create a new (blank) MySQL database on your server and note the access credentials (hostname, database name, username, password).
- Upload all files from the zip file to your server, using FTP or via your hosting control panel.
- Where you uploaded the files, run
/installin your browser and follow the instructions carefully. - If all the steps were successful, you should have access to your site admin and front-end.
- The installer will be secured and no longer accessible. For extra security, you can rename or delete the
/installdirectory.
SMTP Settings
As mentioned above, to avoid emails going into spam boxes, we strongly recommend using SMTP as the mail delivery method. The popular PHPMailer library is used for the job.
To configure SMTP, edit /includes/config_smtp.php
define('SMTP_FROM_NAME',   SITE_NAME); // Leave as-is

define('SMTP_FROM',        'mail@example.com');
define('SMTP_REPLY_TO',    'noreply@example.com');

define('SMTP_HOST',        'mail.example.com');
define('SMTP_USER',        'mail@example.com');
define('SMTP_PASS',        'password');
define('SMTP_PORT',        587); // Commonly 25, 465 or 587
define('SMTP_SECURE',      'tls'); // Commonly 'tls' or 'ssl'
Check with your host if you are unsure of the settings to use. After saving, test SMTP works correctly by navigating to your site contact form and submit the form.
If you would prefer to temporarily use PHP's native mail() sending method, rename the /vendor/phpmailer folder to anything else, e.g./vendor/phpmailer.disabled
PayPal Credentials
Your PayPal business account must have access to Expanded Checkout which involves completing their onboarding process form.
You won't be able to test orders, or take real orders until you have PayPal 'client' and 'secret' API keys. Go to the developer dashboard to get them (see Apps & Credentials).
Edit /includes/config_paypal.php
define('PAYPAL_CLIENT_ID',  'xxxxxxxxxxxxxxxxxxxxxxxxxxxxxxxxxxxxxxxxxxxxxxxxxxxxxxxxxxxxxxxxxxxxxxxxxxxxxxxx');
define('PAYPAL_SECRET',     'xxxxxxxxxxxxxxxxxxxxxxxxxxxxxxxxxxxxxxxxxxxxxxxxxxxxxxxxxxxxxxxxxxxxxxxxxxxxxxxx');
define('PAYPAL_MODE',       'sandbox'); // 'sandbox' or 'live'
define('PAYPAL_CURRENCY',   CURRENCY_CODE); // Leave as-is
For a list of test card numbers in sandbox mode, click here. An easy Visa test card number to remember is 4111 1111 1111 1111
Once you have confirmed that orders work correctly in 'sandbox' mode, you can change the PAYPAL_CLIENT_ID and PAYPAL_SECRET to the 'live' credentials and set the PAYPAL_MODE to 'live'.
SCA/3D Secure
PayPal uses two-factor authentication for online transactions, known as "Strong Customer Authentication" (SCA). For online transactions in Europe and the UK, this extra security is to help keep online card purchases more secure and prevent fraud. By default, SCA is triggered 'when required'. To make it mandatory, in /checkout.php replace...
contingencies: ['SCA_WHEN_REQUIRED'],With...
contingencies: ['SCA_ALWAYS'],Site Migration
If you are changing URL, or moving from a development URL to a live URL, there is a site migration SQL file included in the XCMS distribution zip file.
It will change all base URLs, everywhere they are stored in the database, including image paths, hyperlinks etc.
First make a database backup, then read and edit /install/sql/migrate-site-url.sql and apply it using a tool such as PHPMyAdmin.
SET @old_url = 'https://example.com/old';
SET @new_url = 'https://example.com/new';
You may also need to manually update the following...
- The ErrorDocument 403 directive path in
/.htaccess - The RewriteBase directive path in
/.htaccess - The URL path to sitemap.xml in
/robots.txt - The 'SITE_URL' setting in
/includes/config_site.php
Content
WYSIWYG Editors
TinyMCE 8 is used for editing HTML content. It has some custom plugins, the toolbar buttons of which are highlighted below...

- HTML Block Helpers - Highlight Parent Block | Highlight Block | Move Block Up | Move Block Down | Duplicate Block | Delete Block | Insert Paragraph at End
- Templates - Add New Template | Insert Template
- Media - Insert YouTube Video | Insert MP4 Video | Insert MP3 Audio | Insert Bootstrap Icon
Templates
Insert pre-made template blocks into the editors easily. When you select a template, the HTML block will be inserted at the cursor position in the editor.
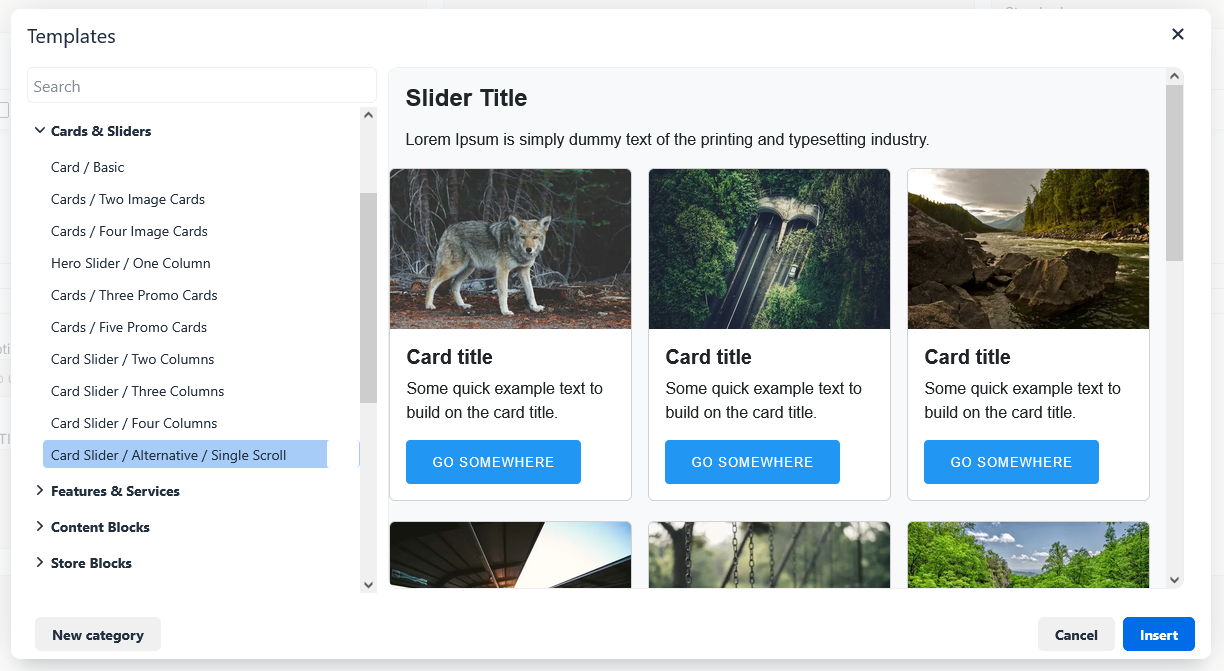
You can add a new template by highlighting HTML content and clicking the 'Save as template' toolbar button.
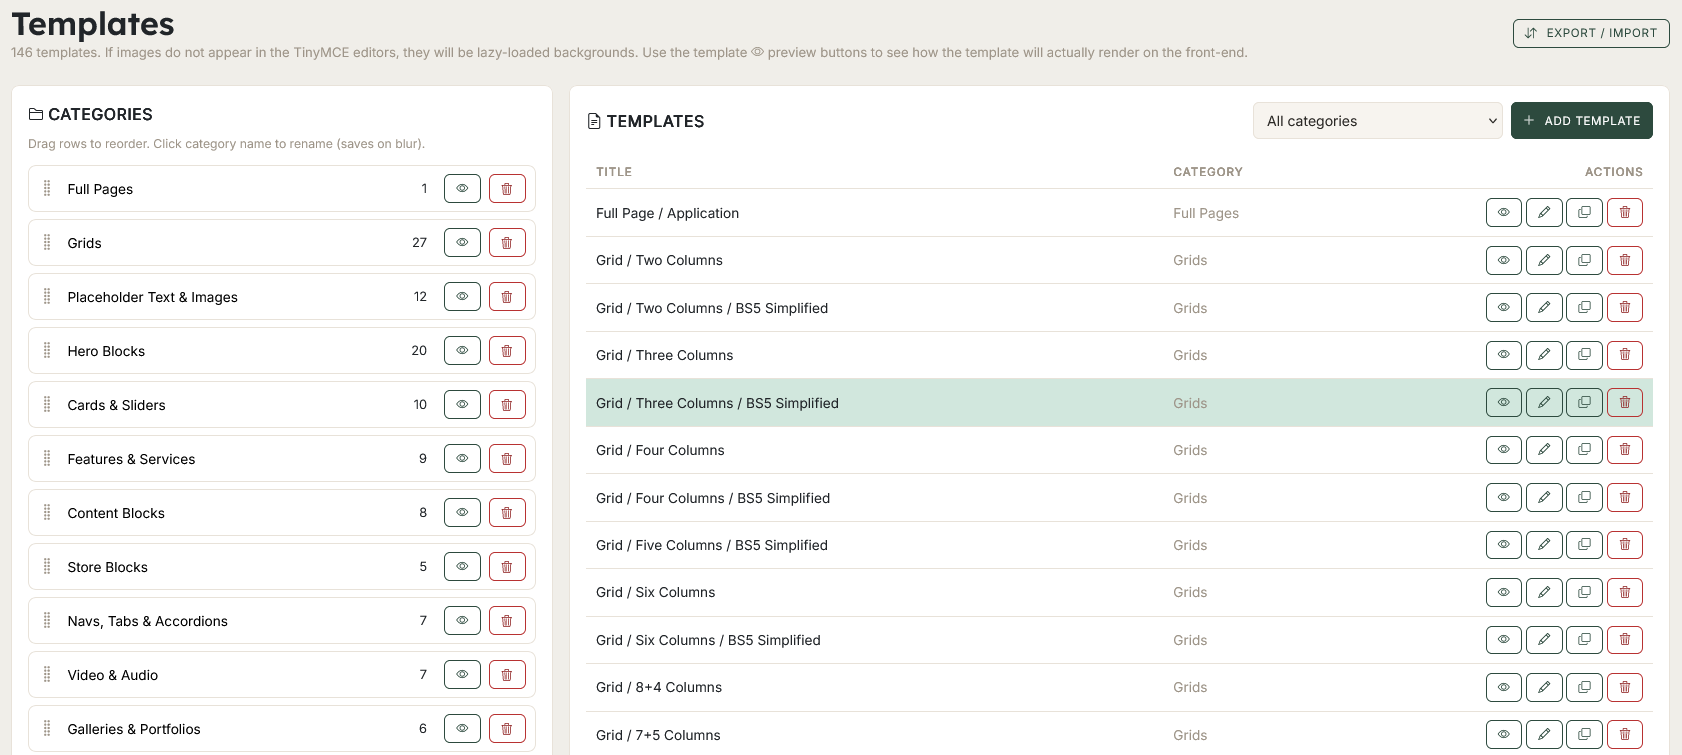
To manage templates, go to admin > templates. XCMS comes with 150+ templates, which are categorised by type.
- Add and modify categories
- Edit templates and add new templates
- Preview templates in various screen widths
- Export and import templates
Pages
There are 3 page types - homepage, FAQ and standard. Pages can be linked to in the site header and/or footer (homepage excluded).
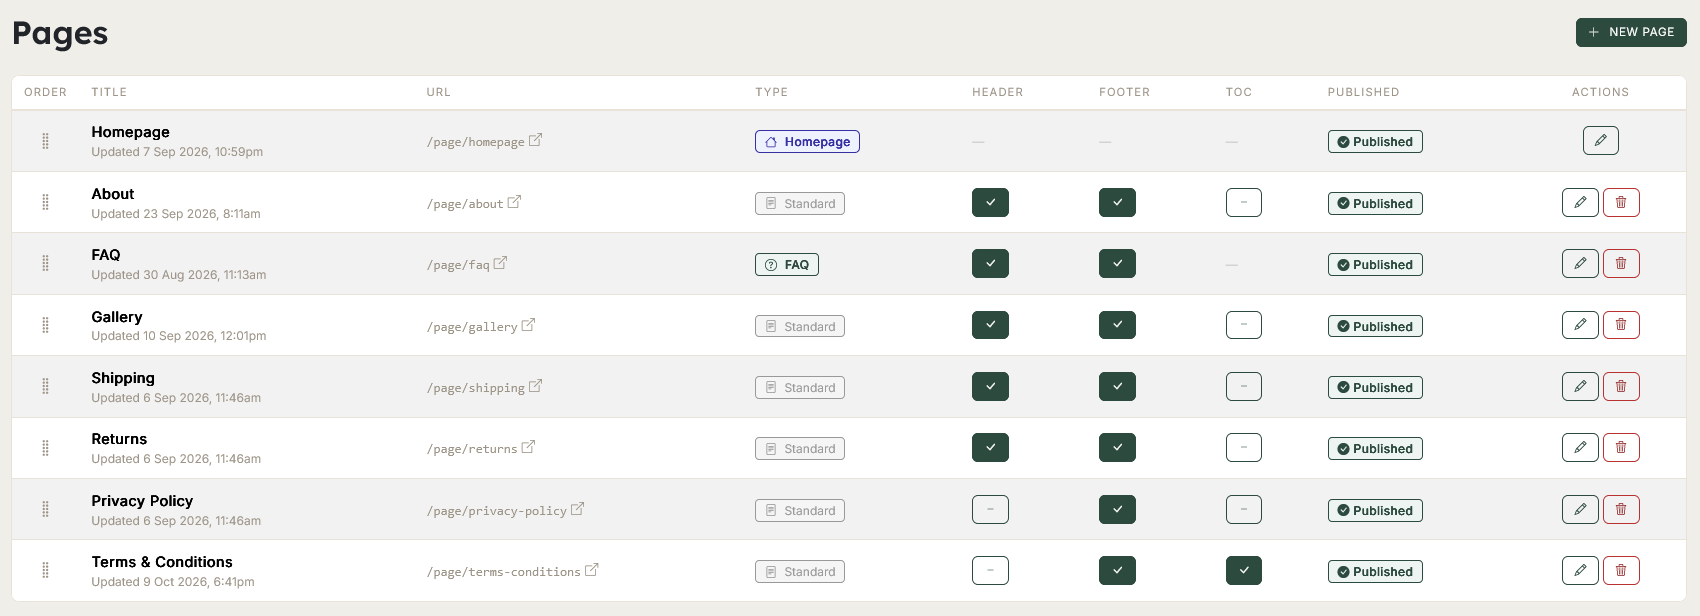
Pages can have an auto-generated table of contents (like this documentation page). It generates a TOC sidebar menu based on H2 and H3 headings in the page content.
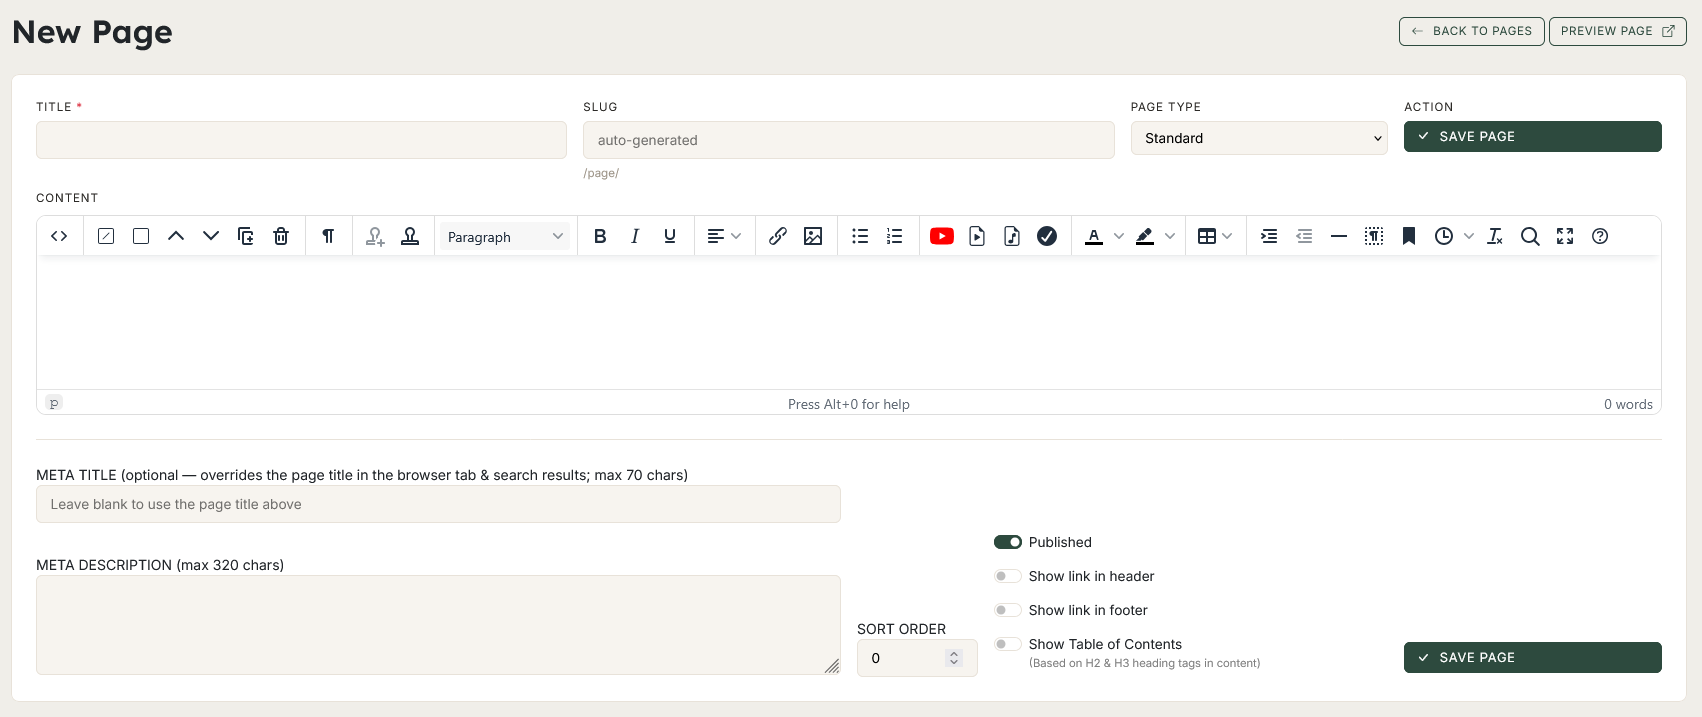
To optimise SEO, you can add custom meta titles and descriptions.
Homepage
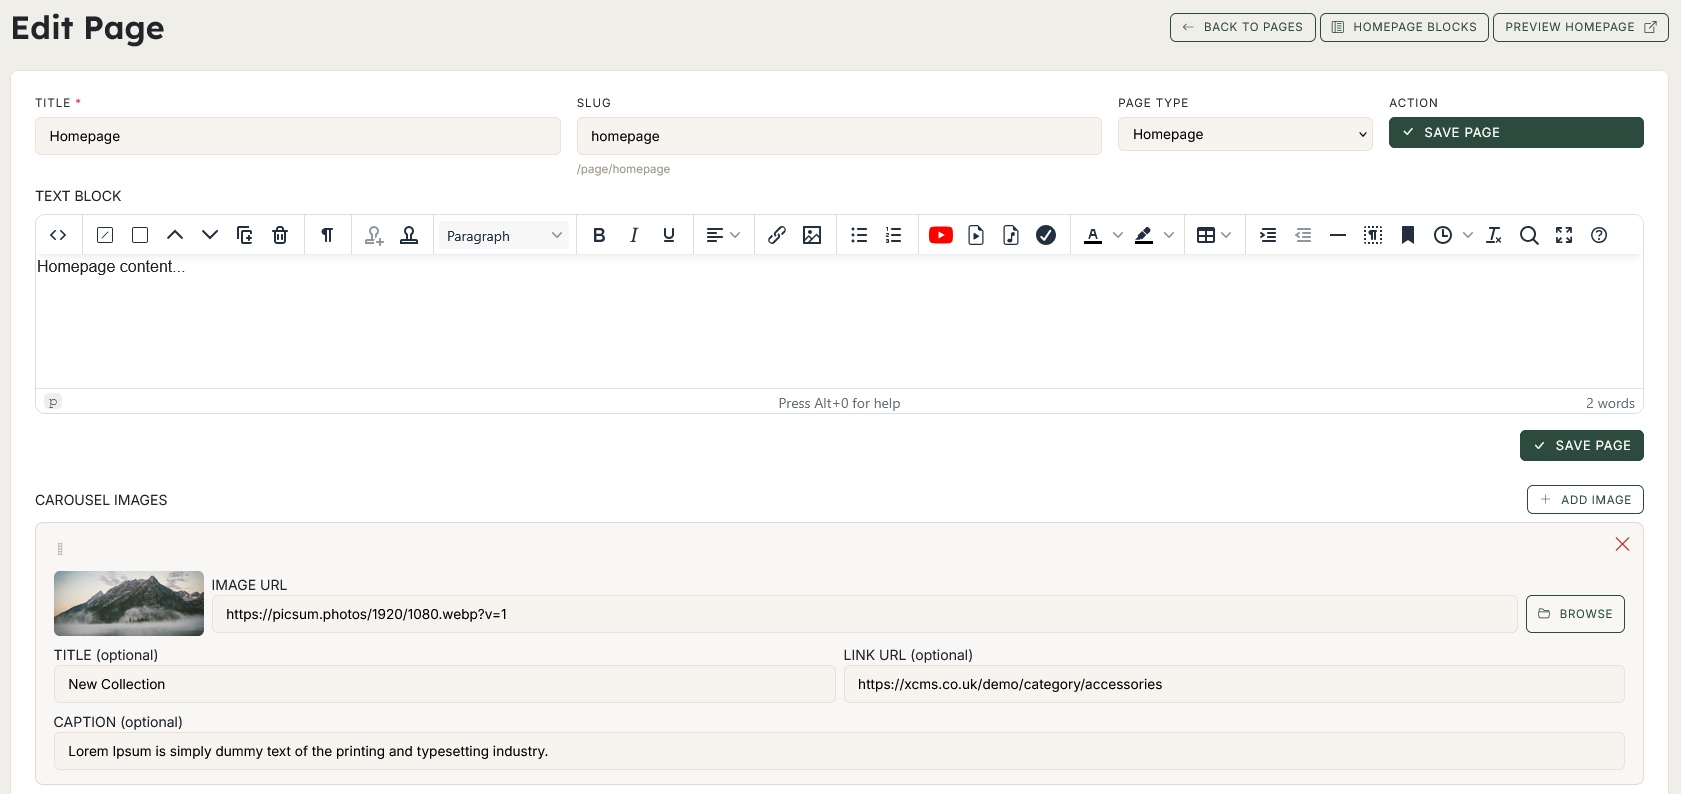
The homepage is a required page and non-deletable. You can generate a Bootstrap carousel by uploading images. The carousel will appear above the page content. We recommend sizing the carousel images to aspect ratio 21:9, e.g. 1920 x 823 or 1280 x 548
You can make the carousel display boxed or fluid (full width of page), by editing the setting - Homepage > Display Carousel
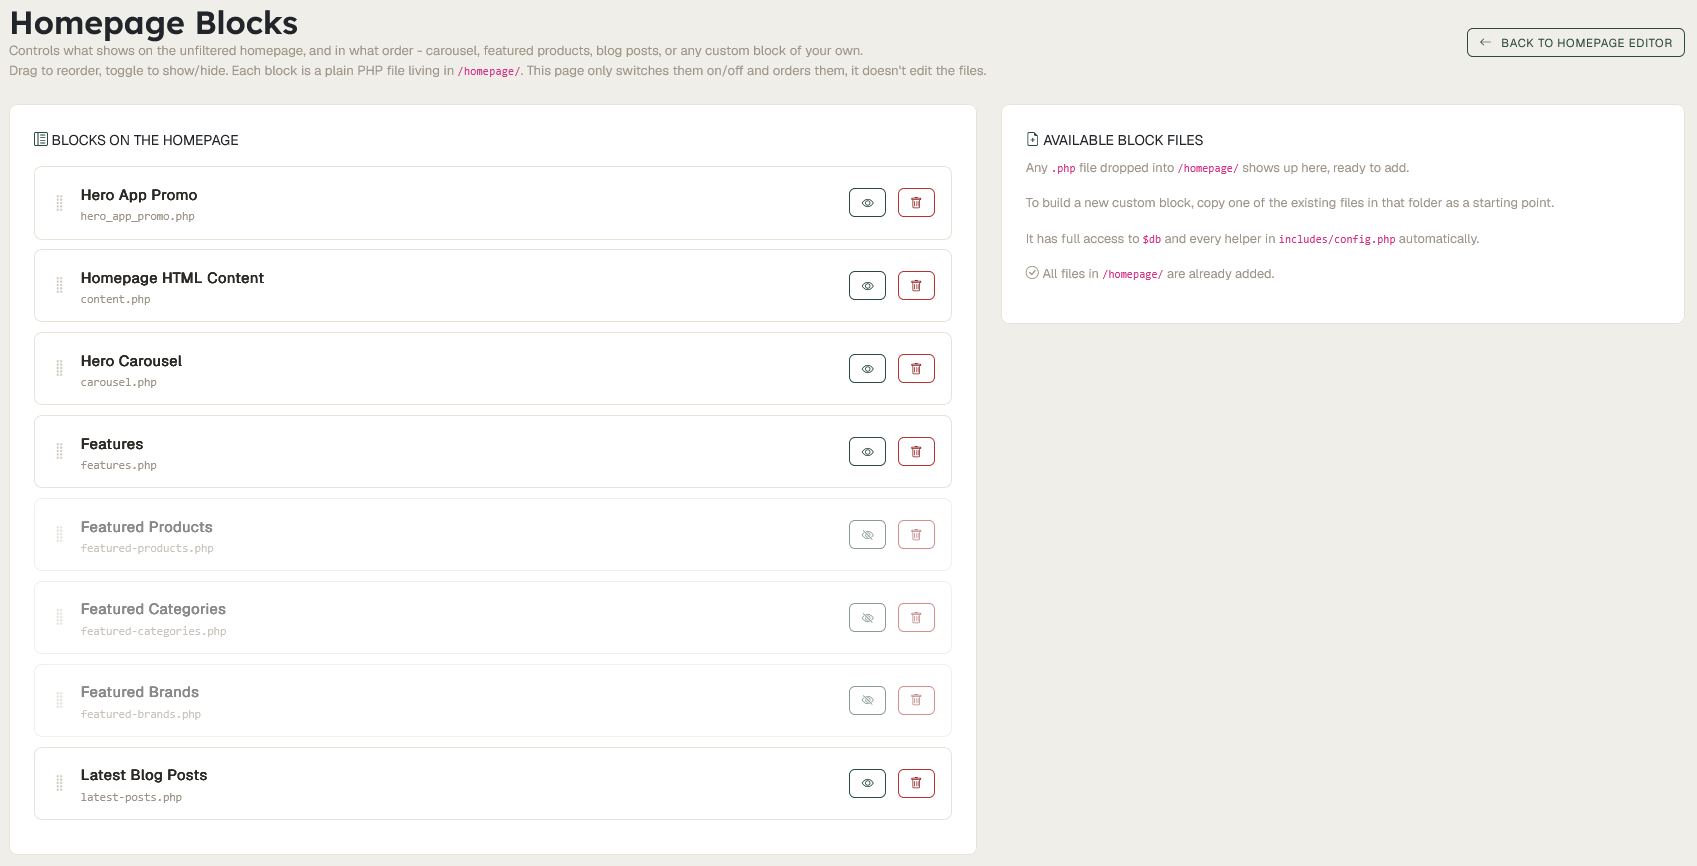
The Homepage Blocks section controls what is shown on the homepage, in what order, with drag and drop. You can easily add new blocks by dropping files into the /homepage folder.
FAQ Pages
FAQs appear as accordions. To add a FAQ page, set the page type to 'FAQ'. Questions and answers can be categorised (optional) and re-ordered with drag and drop. When adding new FAQ(s), the HTML editor(s) will only appear after you save the page.
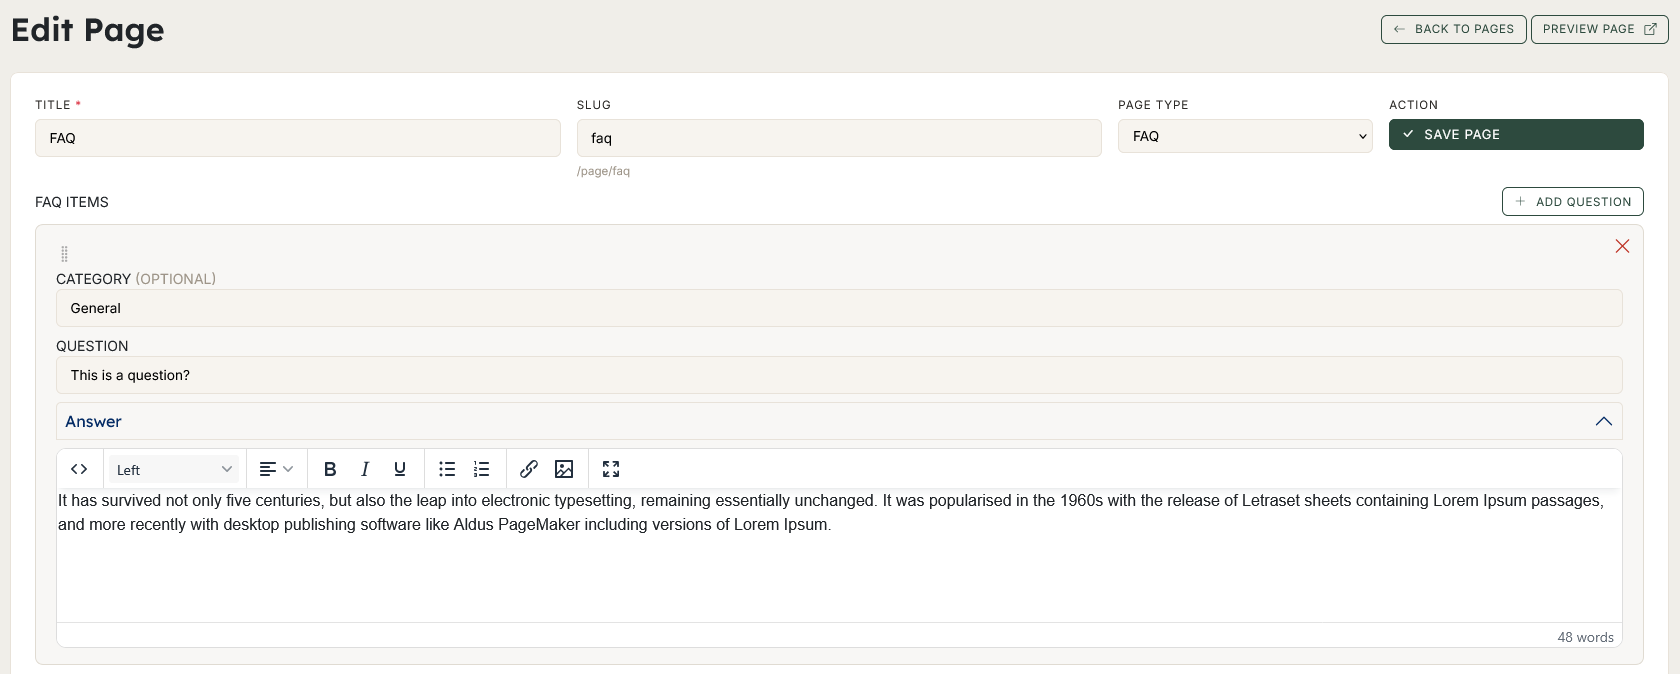
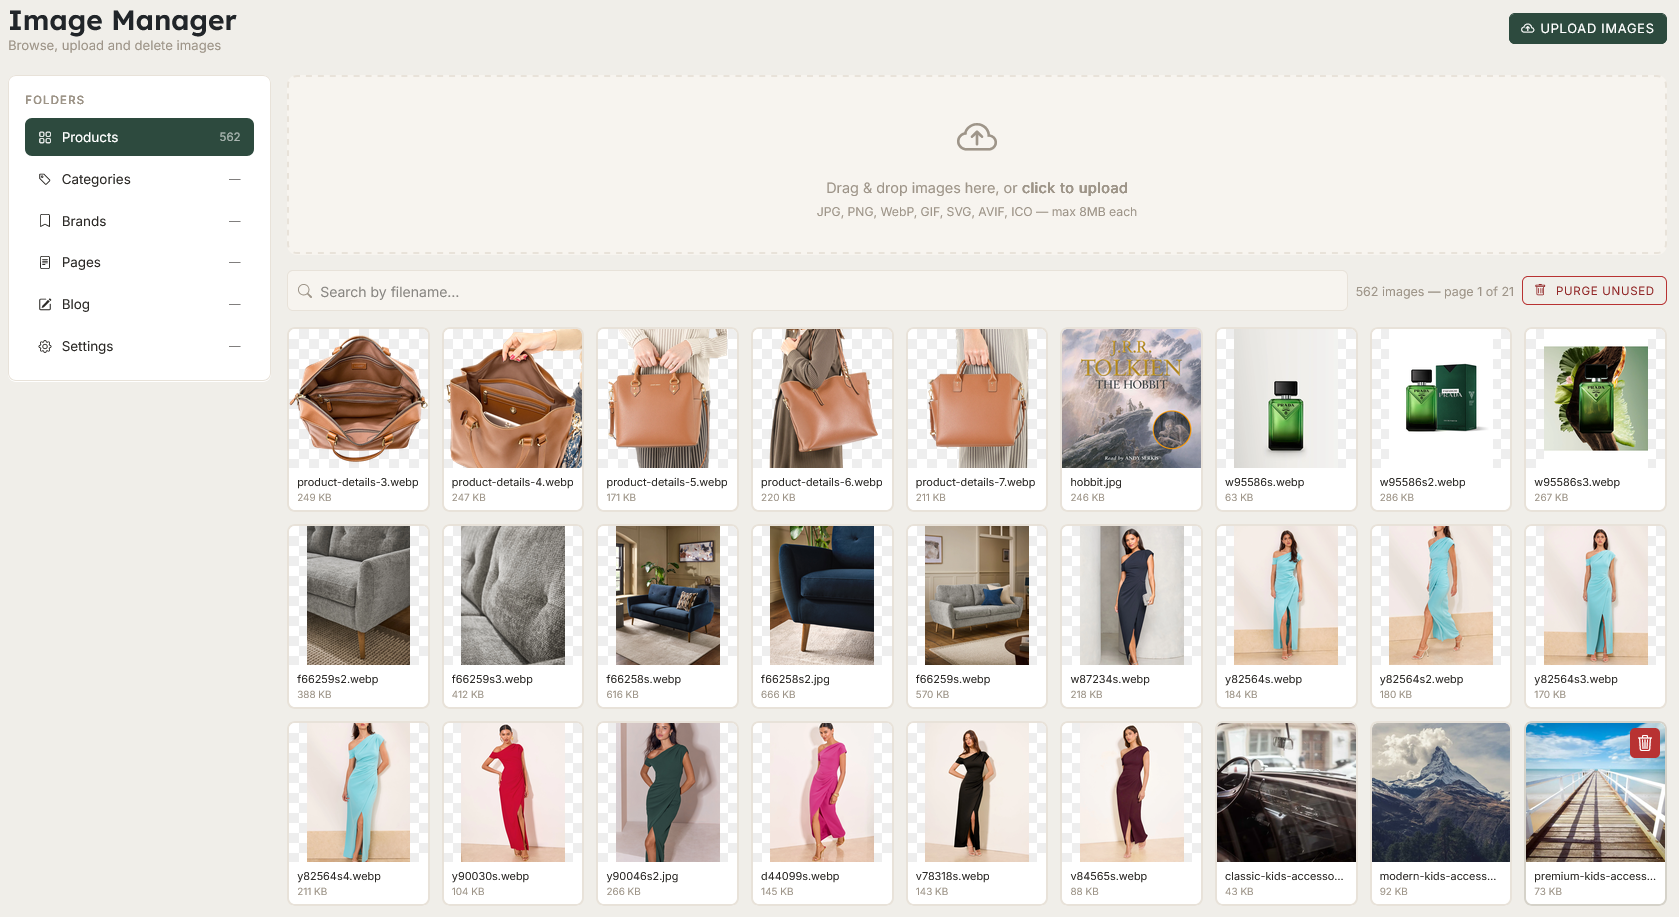
Image Manager
Search, upload and delete images in the manager. You can also purge product images that are not associated with any products, which saves disk space.
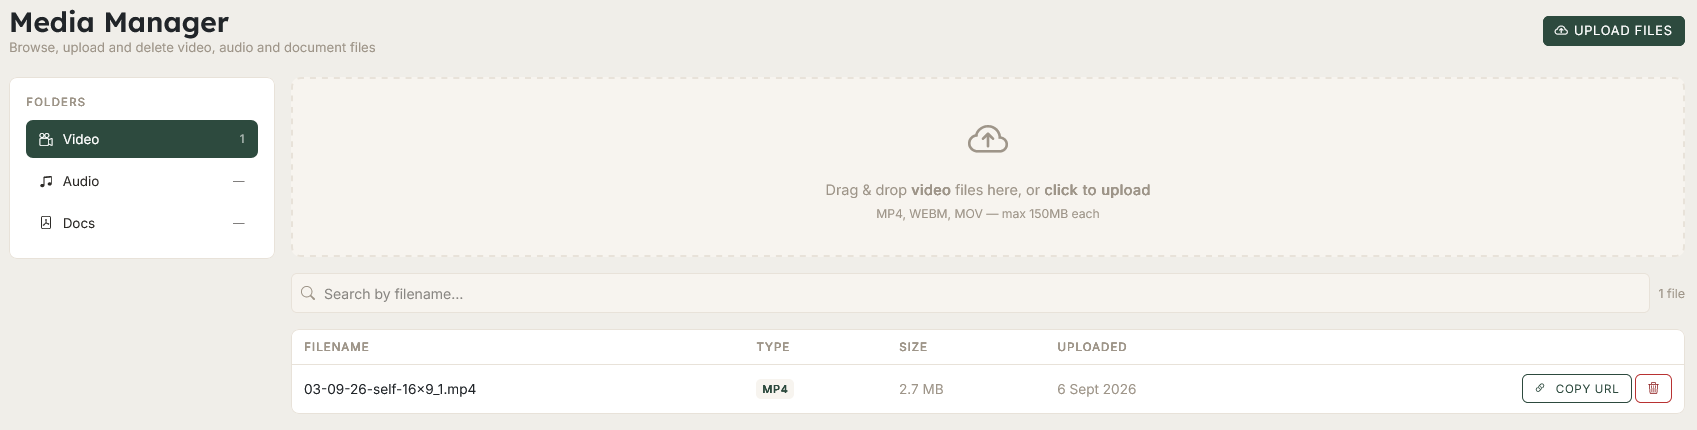
Media Manager
Search, upload and delete media files in the manager. You can upload video files, audio files and documents, which can be inserted into pages and blog posts etc. via the HTML editor.
Store
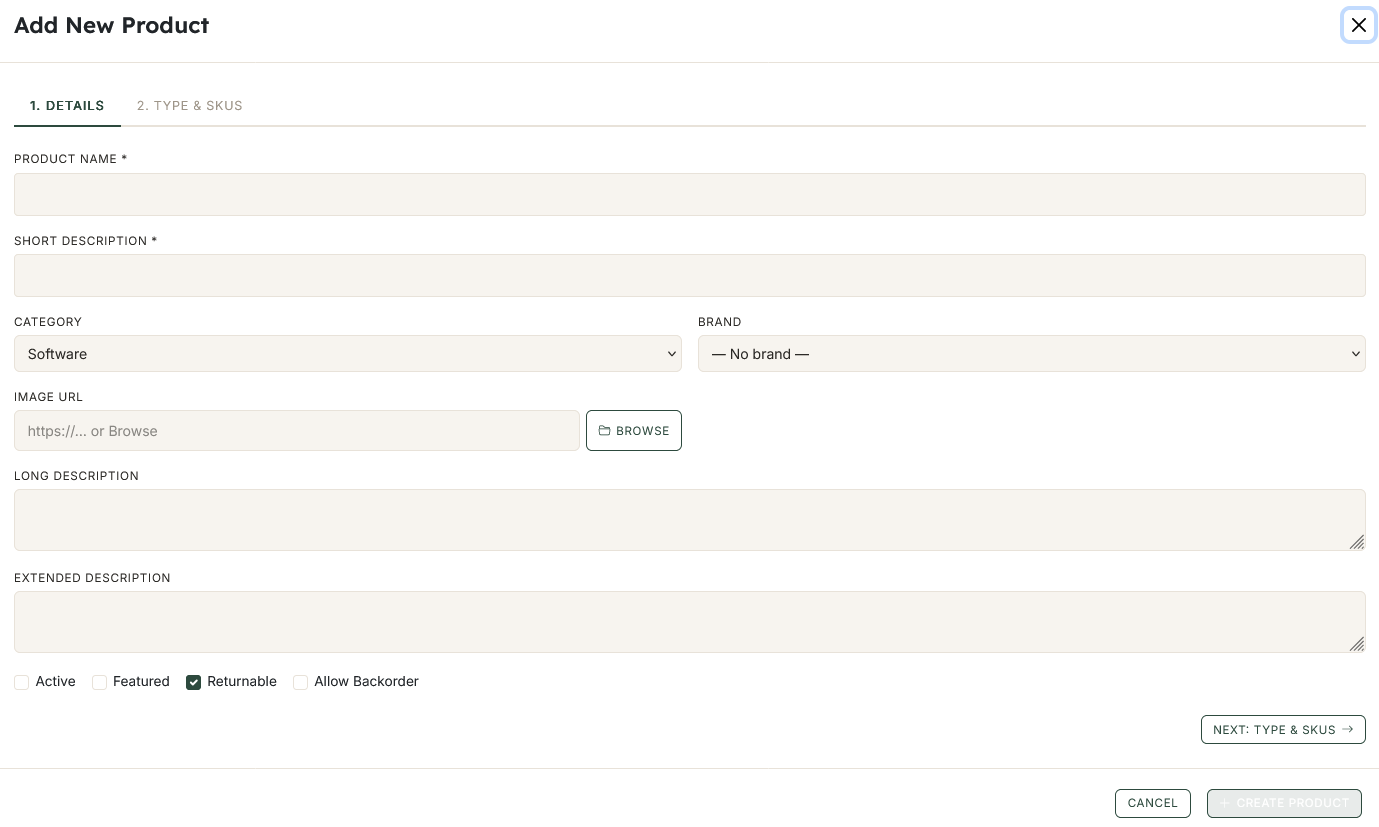
Adding/Editing Products
When adding a product, the first page requires you to add the basics details...
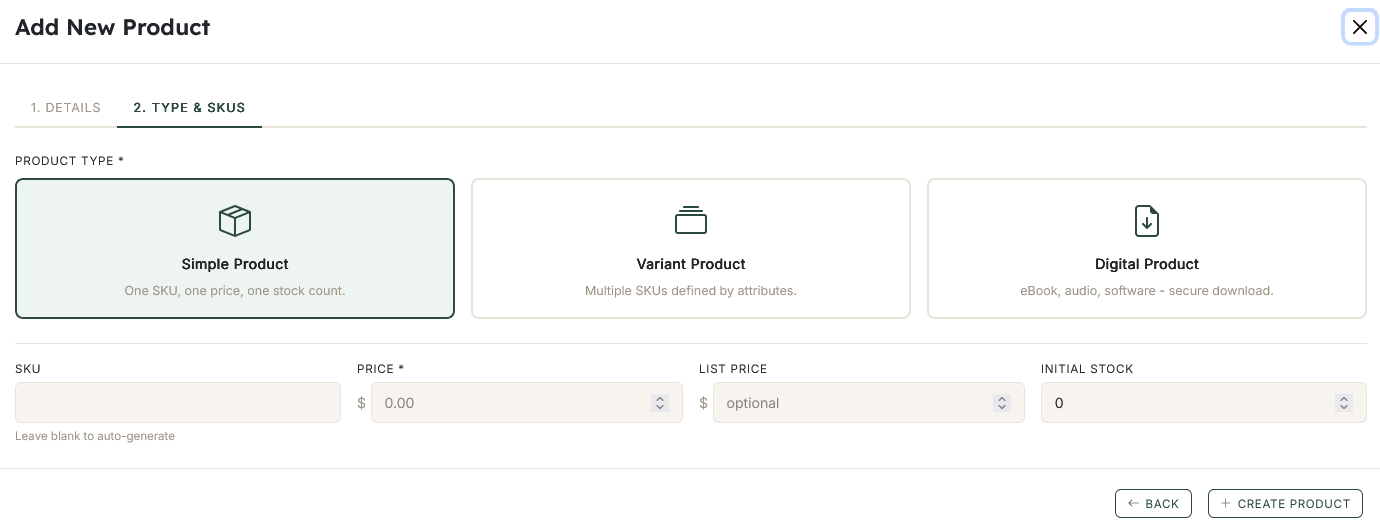
Secondly, you choose the product type...
- Simple - One SKU, one price, one stock level
- Variant - Multiple product attributes, SKUs, prices and stock levels
- Digital - One SKU, one price, maximum number of downloads and expiry date
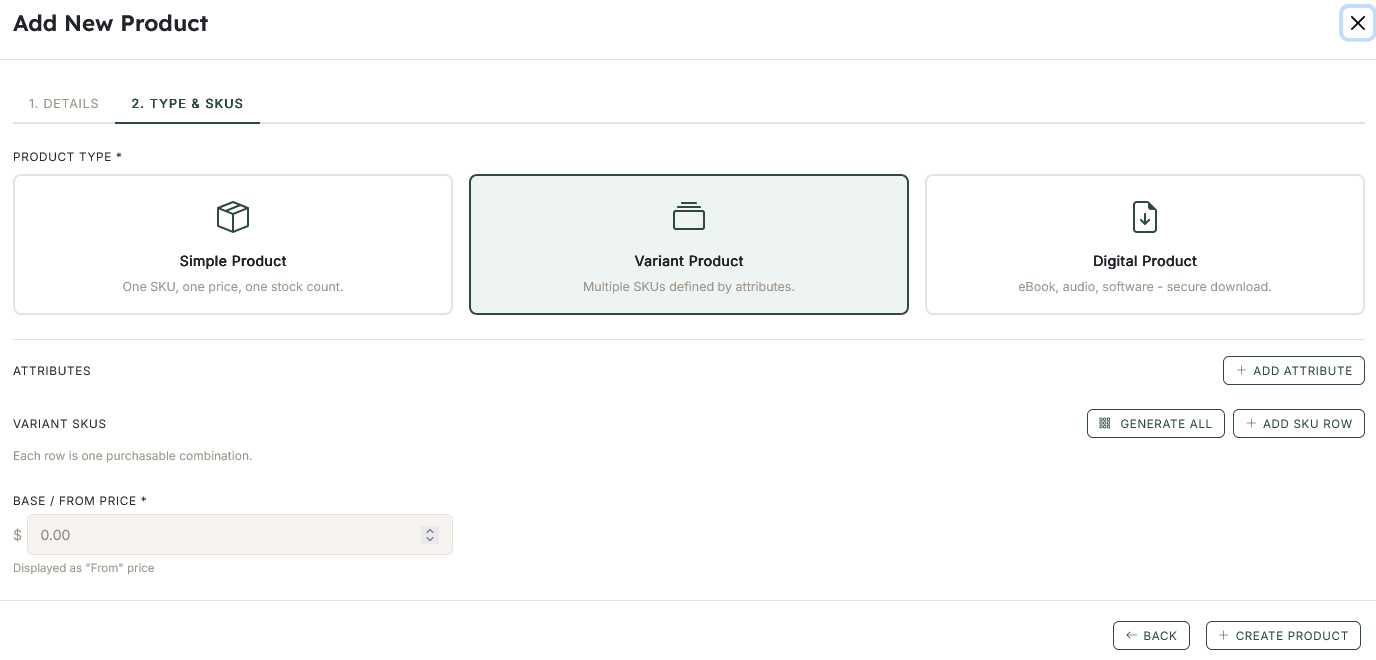
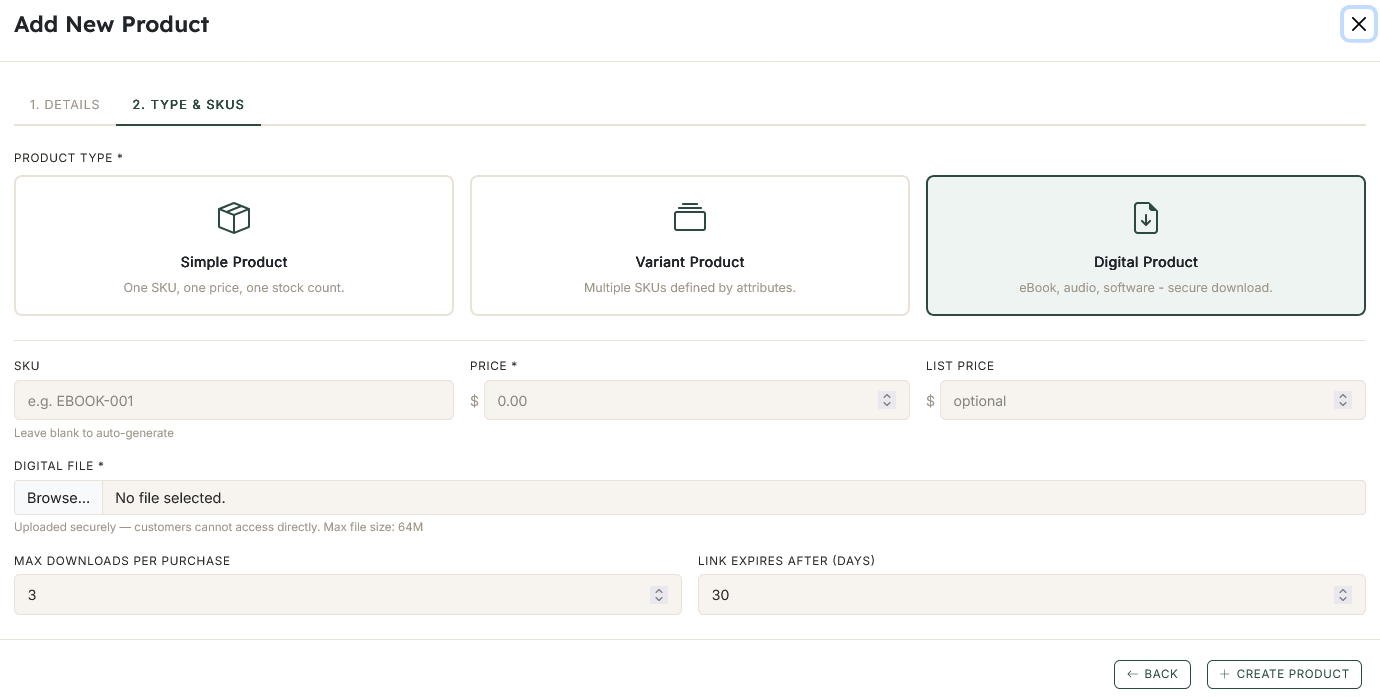
In the case of variant products, in the screenshot below there are two attributes, size and colour. Separate attribute options with pipe characters...
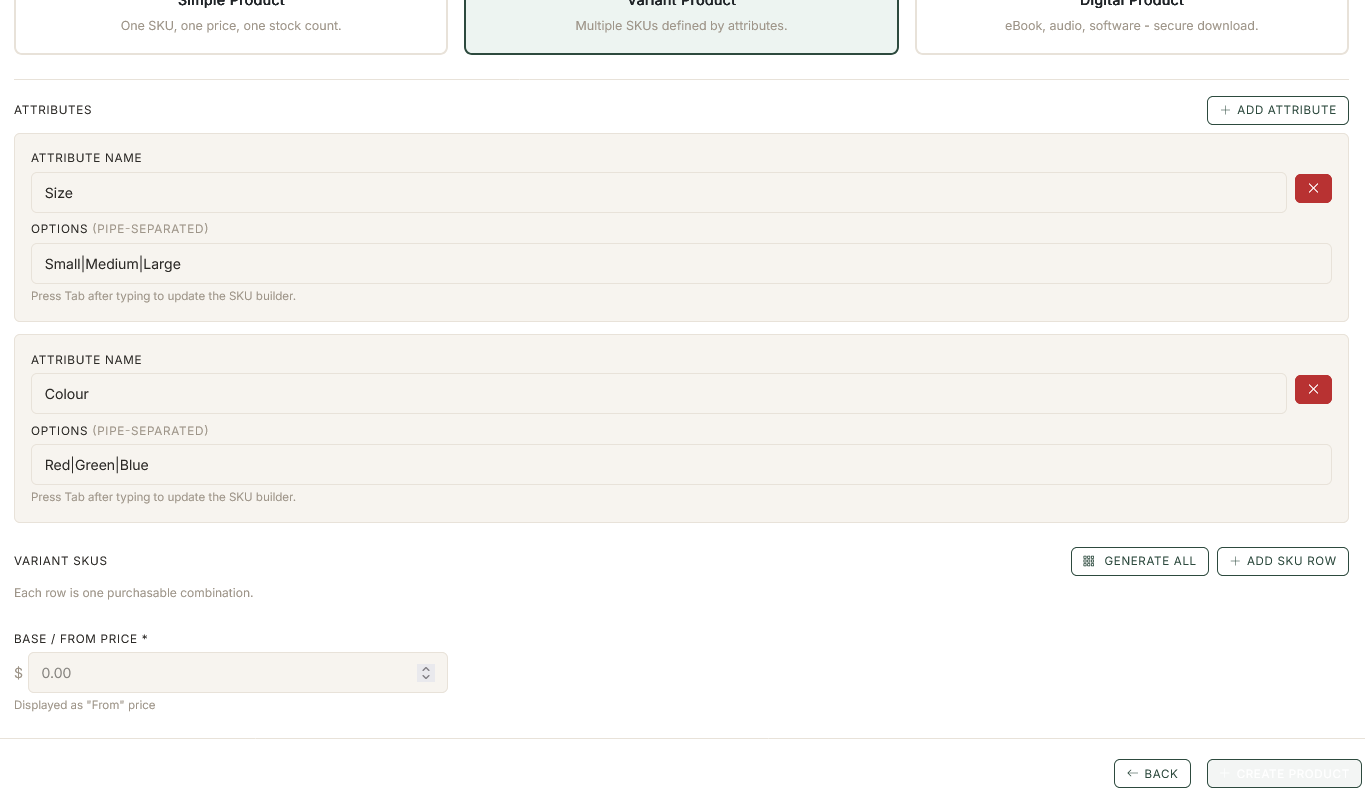
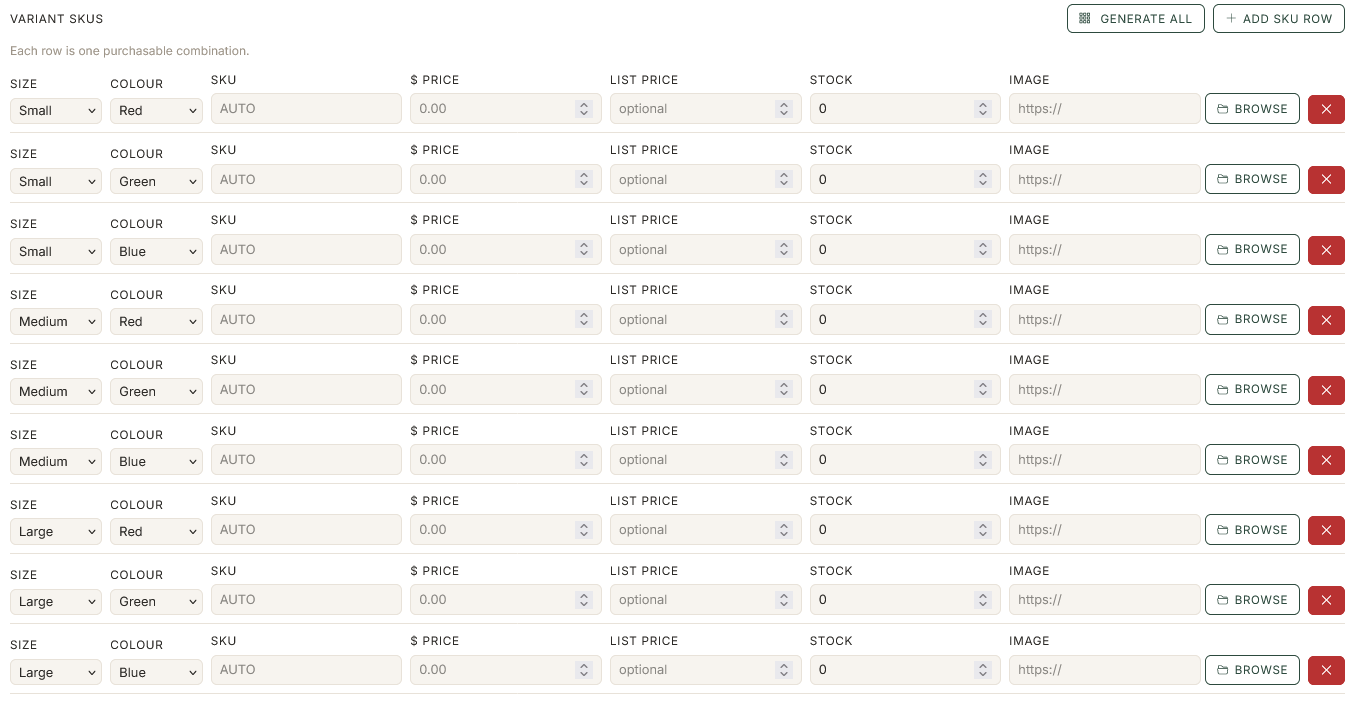
In the example above, we've added 3 sizes and 3 colours. On clicking 'Generate All', you'll see the 9 possible variants, which you can edit.
SKU's for each variant can be auto-generated if you wish. Each variant can have it's own image.
Once you have added the variant product, you'll be able to edit the product in full, as well as tweak the variants...
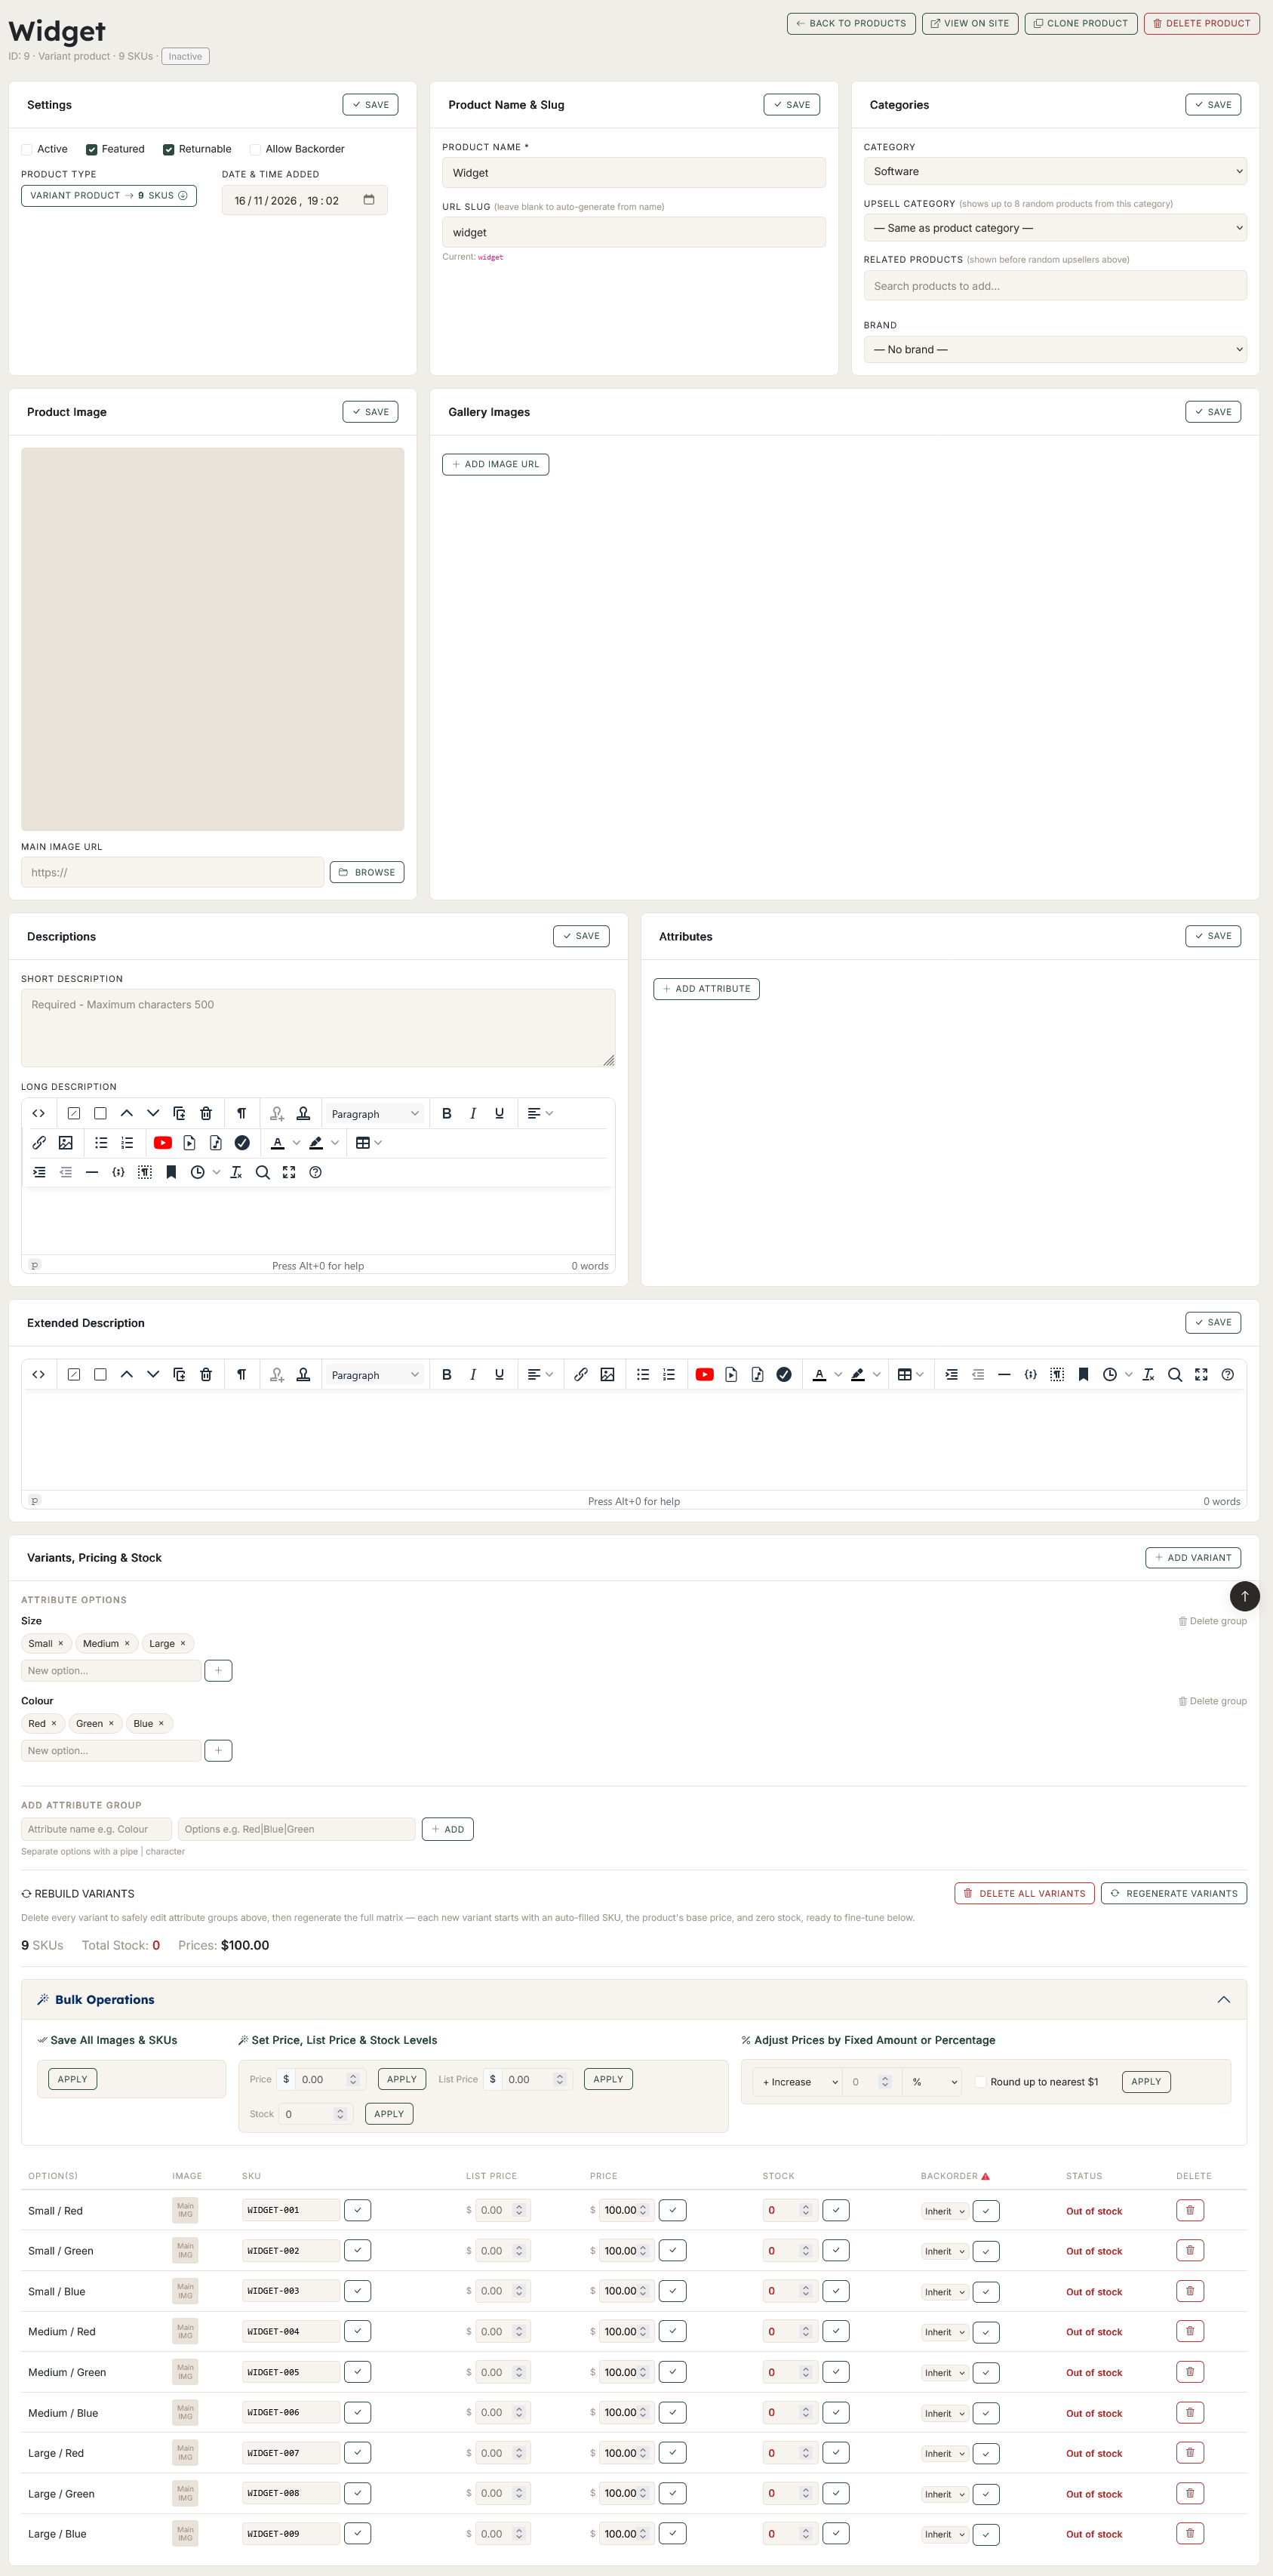
Importing Products
You can import 'simple' (no variants) and 'digital' type products at admin/products-import-export.php
Variant products aren't covered by the import tool. If you have just installed XCMS and want to get a feel of how a populated store will look like, you can import dummy categories, simple products and images, using this CSV file.
Cloning Products
If you need to add new products that are very similar to others, you can easily clone products, either from the admin product listing page, or from the admin edit product page itself.
Categories
...
Brands
...
Countries
...
Shipping Rates
...
Coupons
...
Reviews
...
Customers
...
Blog
Categories
...
Posts
...
Comments
...
Contact Forms
Creating
...
Managing
...
Downloads
Creating
...
Managing
...
Newsletters
Subscribers
...
Campaigns
...
Admin
Settings
...
Accounts
...
Backup
...
Maintenance
...
Analytics
...
GEOIP Data
...
Security
...
Redirects
...
Tools
...
XML Sitemaps
...
Error Log
...